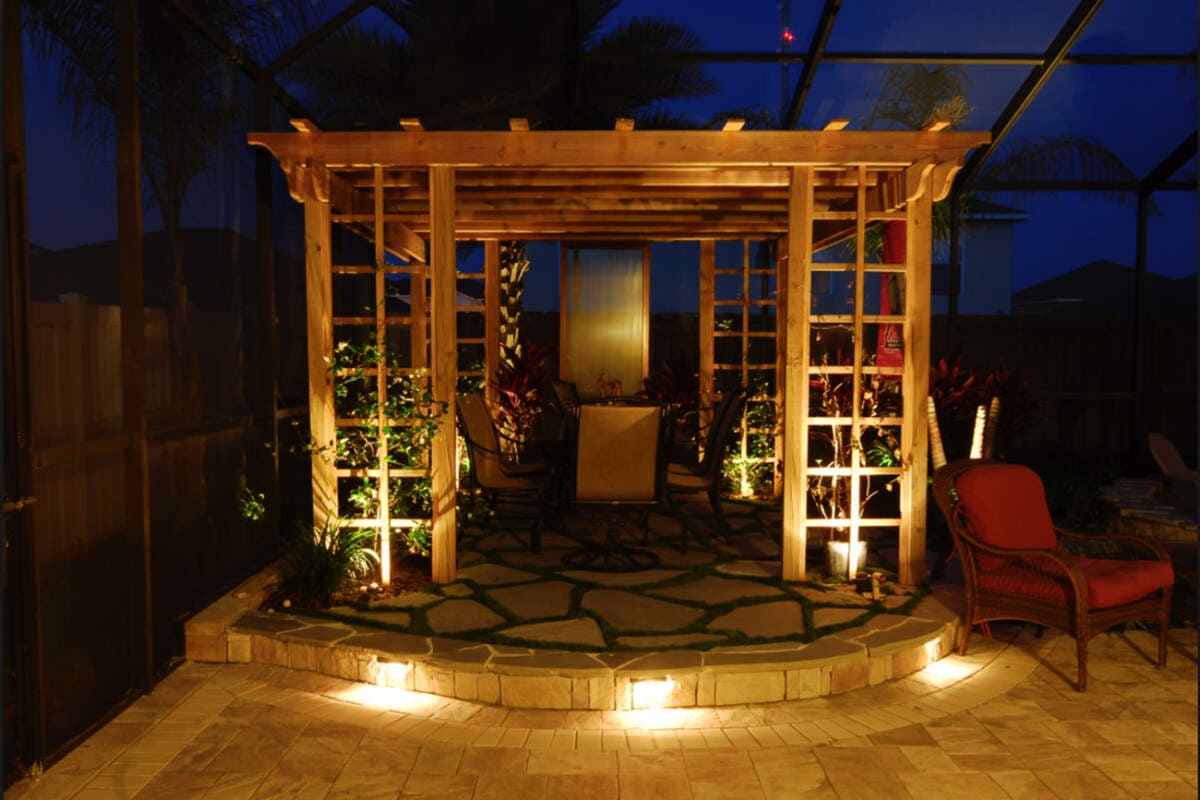
У вас было видение: идеальная, плавная река света, текущая под вашими кухонными шкафами, яркое сияние, подсвечивающее ваш телевизор, или элегантная линия света, подчеркивающая потолочный свод. Вы потратили время на тщательные измерения, резку и установку новых светодиодных лент. Вы отступили назад, чтобы полюбоваться своей работой, и на мгновение она выглядела фантастически. Но затем, на следующее утро, вы входите в комнату и обнаруживаете грустную, свисающую полоску огней, висящую на нитке, свидетельство невыполненных обещаний и слабого клея. Это удручающе распространенный опыт, который может заставить даже самого энтузиаста-сделателя захотеть вообще отказаться от полосового освещения.
Так почему же светодиодные ленты, которые продаются с обещанием легкой установки «отслаивай и приклеивай», так часто не оправдывают этого обещания? Проблема редко заключается в единичной, изолированной ошибке. Чаще всего это целая буря факторов, работающих против вас: некачественный заводской клей, который никогда не предназначался для поверхности вашей стены, неправильно подготовленная поверхность, покрытая невидимой пылью, сложная окружающая среда с жарой или влажностью или просто неустанное, неумолимое притяжение силы тяжести.
Это последнее руководство, которое вам когда-либо понадобится по этой теме. Я сам боролся с этой конкретной проблемой больше раз, чем могу сосчитать, и с тех пор я каждый раз изучал науку и профессиональные методы, которые необходимы для безупречной и постоянной установки. Мы выйдем далеко за рамки упрощенного совета «лучше очищать поверхность». Мы разберем весь процесс: от понимания химии клеев до выбора подходящей ленты промышленного класса и освоим передовые методы механического монтажа, которые будут надежно удерживать ваши светодиодные ленты на месте, независимо от того, где вы решите их установить.
Будьте готовы стать экспертом. Мы изучим распространенные причины падения полос, углубимся в науку о адгезии, проведем мастер-класс по установке и предложим полный набор решений — от специализированных зажимов и алюминиевых каналов до горячего клея и стяжек — чтобы гарантировать, что ваш следующий проект освещения будет устойчивым и блестящим успехом.
Часть 1. Диагностика. Почему светодиодные ленты продолжают отваливаться?
Прежде чем мы сможем назначить правильное лечение, нам необходимо точно диагностировать заболевание. Понимание того, почему ваши светодиодные ленты выходят из строя, является первым и наиболее важным шагом к предотвращению повторения этого в будущем. Давайте приоткроем завесу над обычными виновниками, которые вместе пытаются саботировать вашу установку.
Виновник №1: удивительная слабость предварительно нанесенного клея
Важно понимать, что не все клейкие ленты одинаковы. Тонкая двусторонняя лента, которая предварительно наклеивается на обратную сторону многих недорогих светодиодных лент, часто представляет собой универсальный малоклейкий клей. Его выбирают производители, потому что он недорогой и достаточно хорошо работает в «идеальных» лабораторных условиях, то есть на идеально гладкой, чистой, непористой поверхности при стабильной комнатной температуре.
К сожалению, наши дома — не лаборатории. В тот момент, когда заводской клей подвергается воздействию реального мира пыли, текстурированных стен и колебаний температуры, его ограничения становятся очевидными. Эта стандартная подложка может быстро прийти в негодность, потерять свою первоначальную липкость и часто является основной причиной отказа при любой установке. Он просто не предназначен для разнообразных и сложных поверхностей, встречающихся в типичном доме. Полагаться исключительно на эту предварительно нанесенную ленту часто приводит к разочарованию.
Неумолимая поверхность: самая распространенная ошибка при установке
Даже самый прочный клей в мире не сможет обеспечить должный контакт с поверхностью. Именно здесь большинство установок идет не так. Зачастую проблема заключается в самой поверхности.
- Проблема пыли, грязи и мусора: Клеевое соединение работает на микроскопическом уровне. Даже слой пыли, настолько тонкий, что он невидим невооруженным глазом, создает массивный барьер, который не позволяет клею образовать прочную химическую связь с реальной поверхностью. По сути, полоска не прилипает к стене; к нему прилипает рыхлый слой пыли, который затем легко снимается.
- Проблема пористых и текстурированных поверхностей: Некоторые поверхности по своей природе трудно склеить с любым клеем.
- Текстурированные стены: Тонкие выступы и впадины текстурированной стены или стены, окрашенной в цвет «апельсиновой корки», означают, что плоская клейкая лента соприкасается только с самыми кончиками выступов. Это может уменьшить общую площадь контакта с поверхностью более чем на 50%, что приведет к очень слабому и хрупкому сцеплению, которое обречено на провал.
- Пористые поверхности: Такие материалы, как необработанное дерево, кирпич, бетон или грубая штукатурка, являются пористыми. Они могут поглощать жидкие связующие вещества из клея, ослабляя его, или просто не обеспечивают гладкую и устойчивую поверхность, за которую лента могла бы зацепиться.
- Пластмассы с низкой поверхностной энергией (LSE): Некоторые современные пластики, такие как полипропилен и полиэтилен, имеют молекулярную структуру, благодаря которой они кажутся слегка «маслянистыми» или «восковыми». Это «антипригарное» качество активно отталкивает клей, что очень затрудняет получение прочного соединения без специализированных грунтовок.
Невидимые враги: как окружающая среда вашего дома мешает вашим полоскам
Помимо самой поверхности, вы должны учитывать среду, в которой установлены полосы. Действуют невидимые силы, которые со временем могут активно разрушать клеевую связь.
| Экологический фактор | Как это приводит к неудаче | Общие проблемные области |
|---|---|---|
| Нагревать | Чрезмерное тепло — главный враг большинства клеев. Тепло, будь то из окружающей среды (например, прямой солнечный свет, падающий на стену) или от самих светодиодов (особенно мощных лент без надлежащей вентиляции), может привести к размягчению клея, потере его внутренней когезионной прочности и превращению в липкую, нелипкую массу. Со временем он просто соскользнет с поверхности. | Установка над кухонными плитами, рядом с обогревателями или радиаторами, на стенах или окнах, на которые попадает интенсивный прямой солнечный свет, или со светодиодными лентами высокой плотности, закрытыми без радиатора. |
| Влажность & Влага | Водяной пар – второй невидимый враг. Высокая влажность воздуха может позволить микроскопическим молекулам воды просачиваться под край клея, медленно разрушая его химическую связь с поверхностью. Прямой контакт с водой, брызгами или паром еще более разрушительен и приводит к очень быстрому выходу из строя большинства стандартных клеев. | Ванные комнаты (особенно рядом с душем), кухни (возле раковин или посудомоечных машин), прачечные, подвалы без кондиционеров, а также любые наружные или полуоткрытые установки. |
| Колебания температуры | Большинство материалов в вашем доме расширяются, когда нагреваются, и сжимаются, когда остывают. Стена, деревянная полка и пластик светодиодной ленты будут делать это с разной скоростью. Эти крошечные, постоянные движения создают огромное напряжение сдвига на жесткой клеевой связи, которая удерживает их вместе. В течение многих циклов это может привести к тому, что клей растрескается, станет хрупким и в конечном итоге выйдет из строя. | Гаражи, мастерские, трехсезонные солярии, чердаки и любые наружные помещения, где резкие перепады температуры днем и ночью значительны. |
Законы физики: неумолимые силы гравитации и напряжения
Наконец, нам предстоит бороться с основными законами физики, которые всегда работают против вашей установки.
- Неизбежное и постоянное притяжение гравитации: Для любой установки, которая не находится на плоской поверхности, обращенной вверх, гравитация — ваш беспощадный враг. На вертикальных стенах или, что еще сложнее, на потолках сила тяжести постоянно тянет полосу вниз. Хотя сила мала, она постоянна. В течение недель и месяцев этого нежного, но настойчивого рывка может быть достаточно, чтобы постепенно преодолеть слабую адгезионную связь. Проблема усугубляется с более длинными и тяжелыми полосками, особенно водонепроницаемыми полосками, заключенными в толстый и тяжелый силиконовый чехол.
- Ошибки оператора во время установки, создающие напряжение: Большое значение имеет и то, как вы будете обращаться с полосой во время установки.
- Растягивание полосы: Соблазнительно натянуть полоску во время ее наклеивания, чтобы получить идеально прямую линию. Однако это подвергает полоску постоянному физическому напряжению, то есть она активно пытается сжаться до своей первоначальной длины. Эта внутренняя сила воздействует непосредственно на клей, оттягивая его от поверхности с момента завершения работы.
- Прикосновение к клейкой основе: Натуральные масла, лосьоны и микроскопическая грязь на пальцах могут мгновенно загрязнить клейкую поверхность. Каждый раз, когда вы прикасаетесь к липкой стороне, вы снижаете ее способность к склеиванию.
- Отслаивание и повторное наклеивание полоски: Большинство клеев, чувствительных к давлению, рассчитаны на одно применение. Каждый раз, когда вы снимаете полоску со стены, чтобы переместить ее, вы не только загрязняете ее пылью с поверхности, но и фундаментально ослабляете внутреннюю структуру клея.
Часть 2. Полный набор инструментов — ваш арсенал решений, позволяющих навсегда сохранить полоски приклеенными
Теперь, когда у нас есть глубокое понимание того, почему светодиодные ленты выходят из строя, мы можем создать комплексный набор решений для борьбы с ними. Успешная установка редко сводится к поиску одной «волшебной пули». Речь идет о создании надежной системы с использованием сочетания превосходных материалов и интеллектуальных технологий. Это ваш арсенал.
Решение 1. Обновление вашей клеевой игры – основа прочной связи
Первый и самый важный шаг — перестать полагаться на слабую заранее нанесенную ленту. Думайте об этой ленте как о временном заполнителе. Для постоянной установки вам необходимо перейти на высокоэффективный клей, предназначенный для этой работы.
Высококачественные двусторонние ленты: ваша первая линия защиты
- Ленты 3M VHB (очень прочная связь): Это бесспорный «золотой стандарт» в мире двусторонних скотчей. VHB — это не просто лента; это сложная акриловая пена, которая создает невероятно прочное, долговечное и постоянное соединение, которое также устойчиво к атмосферным воздействиям и изменениям температуры. Он настолько прочен, что его часто используют в автомобильной и строительной промышленности для замены заклепок и винтов. Лента VHB — ваш лучший друг для любого серьезного наружного или сложного внутреннего применения.
- Ленты 3M 300LSE (с низкой поверхностной энергией): Вы когда-нибудь пытались наклеить этикетку на вощеный пластиковый контейнер, но она тут же отклеивалась? Это потому, что пластик имеет низкую поверхностную энергию (LSE). Если вы пытаетесь прикрепить светодиодные ленты к определенным типам пластика или металлам с порошковым покрытием, стандартная лента не подойдет. Серия 3M 300LSE специально разработана с использованием специального клея, который хорошо приклеивается к этим сложным «антипригарным» поверхностям.
- Высококачественные пенопластовые ленты: Для слегка неровных или текстурированных поверхностей отличным решением может стать качественная пенопластовая лента. Мягкая, сжимаемая пенопластовая сердцевина ленты может соответствовать небольшим выступам и впадинам поверхности, обеспечивая гораздо больший контакт с поверхностью и более прочное общее соединение, чем можно было бы достичь с помощью тонкой плоской ленты.
Жидкие клеи & Клеи: для случаев, когда лента не разрезает
- Горячий клей: Для быстрого и легкого ремонта, особенно на грубых поверхностях, таких как дерево или кирпич, хорошим вариантом может быть горячий клей. Он схватывается очень быстро и отлично заполняет пробелы. Однако у него есть свои недостатки: аккуратно наносить его может быть неаккуратно, и его нелегко удалить. Если вы используете горячий клей, будьте очень осторожны и не наносите его непосредственно на сами светодиодные чипы, так как тепло может привести к повреждению. Наносите его только на обратную сторону полоски между светодиодами.
- Клеи на силиконовой основе: Для помещений с высокой влажностью, таких как ванные комнаты или кухни, отличным выбором будет 100% силиконовый клей. Он создает прочное, гибкое и полностью водонепроницаемое уплотнение, которое не разрушается в присутствии влаги или пара.
- Строительные клеи (например, жидкие гвозди): Это ядерный вариант. Для действительно постоянной установки на поверхность, с которой полосу никогда не придется снимать (например, внутри изготовленного на заказ шкафа), строительный клей создаст нерушимое соединение. Будьте осторожны: его использование почти наверняка повредит поверхность (и светодиодную ленту), если вы когда-нибудь попытаетесь ее снять.
Критическое предупреждение о суперклее: Это может показаться хорошей идеей, но вам следует никогда не используйте цианакрилат (суперклей) на ваших светодиодных лентах. Химический состав суперклея может вступать в резкую реакцию с пластиками и полимерами, используемыми в гибкой печатной плате светодиодной ленты. Со временем это может сделать полосу хрупкой, привести к ее растрескиванию и привести к непоправимому повреждению.
Решение 2. Механические застежки – подход «ремень и подтяжки»
Для полного спокойствия вам необходимо дополнить клей механической опорой. Механические крепления не основаны на химической связи; они обеспечивают физическую поддержку, невосприимчивую к жаре, влажности и пыли. В этом секрет по-настоящему профессионального и безотказного монтажа.
| Тип крепления | Как это работает | Лучше всего для | Плюс & Минусы |
|---|---|---|---|
| Монтажные зажимы/кронштейны | Это небольшие специально изготовленные зажимы, обычно изготовленные из прозрачного пластика или металла. Вы прикручиваете зажим к поверхности (стена, потолок, шкаф), а затем светодиодная лента просто защелкивается в зажим, который надежно удерживает ее на месте. | Почти каждая установка. Они необходимы для длинных пролетов, любых вертикальных поверхностей, любых работ над головой (в перевернутом положении), а также для закрепления углов, где полоса находится под нагрузкой. | Плюсы: Чрезвычайно безопасен и надежен, распределяет вес ленты по клею, выглядит профессионально и чисто. Минусы: Требуется просверлить в поверхности небольшие, легко замазываемые отверстия. |
| Застежки-молнии / Кабельные стяжки | Это простое, но удивительно эффективное решение для крепления полосок к неровным поверхностям. Вы можете использовать прозрачные застежки-молнии, чтобы обернуть полоску вокруг объекта или закрепить ее на рамке или сетке. | Прикрепите полоски к ножкам мебели, каркасу кроватей, металлическим полкам, проволочным решеткам или за открытыми развлекательными центрами, где у вас есть что-нибудь, чтобы их закрепить. | Плюсы: Невероятно дешевый, очень простой в использовании, регулируемый и съемный. Минусы: Их использование ограничено ситуациями, когда у вас есть чем их обернуть. |
| Скобы | С помощью степлера физически прикрепите полоску к поверхности. Этот метод требует особой осторожности и не рекомендуется новичкам. | Быстрое крепление полосок к деревянным поверхностям (например, задней части стола или внутри шкафа), где внешний вид не является главным приоритетом. | Плюсы: Это очень быстрый способ крепления. Минусы: Существует очень высокий риск повреждения хрупкой схемы полоски. Если вы попытаетесь это сделать, вам придется использовать скобы с широкой коронкой, которые могут «выгибаться» над верхней частью полосы, не прокалывая и не сдавливая ее. |
Решение 3. Профессиональный метод – использование алюминиевых монтажных профилей/профилей
Если вам нужна максимально прочная, профессиональная и красивая установка, то использование алюминиевых профилей — бесспорно лучший вариант. Именно так создаются архитектурные и коммерческие объекты высокого класса.
- Что они собой представляют: Это просто алюминиевые профили (или направляющие), предназначенные для размещения светодиодной ленты. Сначала вы вклеиваете светодиодную ленту внутрь канала, а затем крепите весь канал к поверхности, обычно с помощью винтов через монтажные зажимы, предназначенные для канала.
- Тройная выгода каналов:
- Непревзойденная механическая поддержка: Жесткий алюминиевый профиль обеспечивает идеально прямой и надежный корпус, который полностью предотвращает провисание, свисание или падение. Физически невозможно, чтобы полоса вышла из строя.
- Идеальная поверхность для приклеивания: Гладкая, чистая, непористая алюминиевая поверхность канала является идеальной основой для клейкой основы ленты. Связь между лентой и алюминием будет намного прочнее и надежнее, чем связь между лентой и окрашенной стеной.
- Рассеяние тепла и рассеивание света: Это огромное преимущество для долговечности ваших светодиодов. Алюминий действует как радиатор, отводя тепло от светодиодных чипов и рассеивая его в воздух. Это обеспечивает более низкую температуру светодиодов, что значительно продлевает срок их службы. Кроме того, большинство каналов оснащены защелкой. матовая или опаловая крышка диффузора. Эта крышка равномерно распределяет свет, устраняя точечный вид отдельных светодиодов и создавая плавную, бесшовную и профессионально выглядящую линию света.
Решение 4. Другие творческие и временные исправления
- Монтажная шпаклевка: Подумайте о синей или белой липкой замазке, которой вешают плакаты в комнатах общежития. Это отличная, легко снимаемая и универсальная альтернатива ленте. Он идеально подходит для временной установки, для использования на очень деликатных поверхностях, на которых вы не хотите оставлять следов, или для проверки места размещения, прежде чем вы решите использовать постоянное решение.
- Липучки-липучки: Для случаев, когда вам может потребоваться часто снимать и повторно прикреплять светодиодные ленты, ленты-липучки на клейкой основе являются отличным решением. Вы можете приклеить одну сторону к поверхности, а другую — к обратной стороне светодиодной ленты. Это идеально подходит для освещения мероприятий, выставок или портативных проектов.
Часть 3. Основное руководство по установке: пошаговый процесс для гарантированного результата
Знание – сила, но именно применение этих знаний ведет к успеху. В этом разделе представлено очень подробное практическое руководство, объединяющее все лучшие практики, которые мы обсуждали, в единый комплексный рабочий процесс. Тщательно следуйте этим шагам, и вы можете быть уверены, что ваши светодиодные ленты останутся на месте.
Шаг 1. Планирование и измерение (правило «Семь раз отмерь, один раз отмерь»)
Правильное планирование – это 90% успеха. Спешка на этом этапе является наиболее распространенным источником разочарования в дальнейшем.
- Точно измерьте свое пространство: Используйте гибкую швейную рулетку или стандартную металлическую рулетку, чтобы получить точную длину поверхности, которую вы планируете осветить. Не угадывайте и не смотрите на это. Запишите измерение.
- Спланируйте свой источник питания: Вам необходимо убедиться, что ваш источник питания (также называемый драйвером или трансформатором) может выдерживать длину используемой полосы. Посмотрите в характеристиках светодиодной ленты ее «ватты на метр» или «ватты на фут». Формула проста: (Длина полосы) x (Ватт на метр/фут) = Общая необходимая мощность. Как правило, вам всегда следует выбирать блок питания, мощность которого как минимум на 10–20% *больше* превышает расчетную общую мощность. Это гарантирует, что блок питания не будет перегружен, что позволит ему работать дольше и холоднее.
- Прежде чем делать что-либо еще, проверьте свое освещение! Это важный шаг, который многие люди пропускают. Прежде чем снять клейкую подложку или сделать один разрез, разверните светодиодную ленту, подключите ее к источнику питания и убедитесь, что все светодиоды работают правильно. Нет ничего более разочаровывающего, чем завершить идеальную установку и обнаружить мертвый участок посередине полосы.
Шаг 2. Подготовка светодиодной ленты к установке
Теперь, когда вы провели измерения и протестировали светильники, пришло время подготовить саму полоску.
- Отрезаем полоску нужной длины: Большинство светодиодных лент можно разрезать по размеру, но делать это необходимо с точностью. Посмотрите внимательно на полоску; вы увидите обозначенные «линии разреза», которые обычно отмечены маленьким значком ножниц и имеют медные площадки с обеих сторон. Вы должны только разрезать по этим конкретным линиям. Разрез в любом другом месте полосы приведет к повреждению цепи и выходу из строя части фонарей. Используйте острые ножницы или канцелярский нож, чтобы сделать чистый срез.
- Добавление соединителей при необходимости: Если вы разрезали полоску, на новом конце не будет провода для подключения к источнику питания. Чтобы использовать эту деталь, вам нужно будет либо аккуратно припаять новые провода к медным площадкам, либо, что гораздо проще, использовать «беспаечный разъем». Это небольшие пластиковые зажимы, которые фиксируются на конце ленты и обеспечивают новый провод.
Шаг 3. Самый важный шаг из всех – безупречная подготовка поверхности
Я не могу не подчеркнуть это: это самая важная часть всего процесса. Если вы пойдете по короткому пути, даже самый лучший клей в мире выйдет из строя.
- Тщательная и тщательная очистка: Начинать необходимо с идеально чистой поверхности. Единственное лучшее чистящее средство для этой работы — изопропиловый (протирочный) спирт на чистой безворсовой ткани. Спирт — это растворитель, который превосходно удаляет жир, масла и другие остатки и полностью испаряется, не оставляя после себя пленки. Для очень грязных или грязных поверхностей вы можете сначала использовать мягкий мыльно-водный раствор, но после этого обязательно необходимо провести окончательную протирку спиртом, чтобы удалить остатки мыла.
- Убедитесь, что поверхность полностью сухая: После очистки подождите, пока поверхность не высохнет на 100%. Любая остаточная влага, даже от испаряющегося спирта, мгновенно разрушит клеевое соединение.
- Легкое шлифование шероховатых поверхностей (необязательно, но рекомендуется): Если вы прикладываете полосу к шероховатой поверхности, такой как необработанное дерево или сильно текстурированная стена, легкая шлифовка конкретного места установки мелкозернистой наждачной бумагой может иметь огромное значение. Это позволит сбить выступы и создать более гладкую и устойчивую поверхность с большей площадью контакта клея. Обязательно после этого вытрите всю шлифовальную пыль спиртом.
- Использование промотора клея или праймера (продвинутый этап профессионального уровня): Для критически важных применений, очень сложных поверхностей или для тех, кто хочет абсолютного и гарантированного спокойствия, вы можете использовать клей-промотор. Такие продукты, как 3М Праймер 94 — это жидкости, которыми вы протираете поверхность перед наклеиванием ленты. Эта грунтовка вступает в химическую реакцию с поверхностью, которая фундаментально меняет ее на молекулярном уровне, делая ее невероятно восприимчивой к клею. Это может создать связь, которая в несколько раз прочнее, чем просто лента.
Шаг 4. Процесс подачи заявки: точность и терпение окупаются
Когда ваша поверхность идеально подготовлена, пришло время нанести полоску. Не торопитесь здесь.
- Проверьте температуру: Большинство клеев, чувствительных к давлению, лучше всего работают в определенном диапазоне температур. Для получения оптимальных результатов убедитесь, что и поверхность, на которую вы наносите краску, и сама светодиодная лента имеют стабильную комнатную температуру, в идеале — от 60 до 75 °F (от 15 до 24 °C). Не пытайтесь установить ленты на холодную стену гаража в середине зимы или на запеченную солнцем металлическую поверхность летом.
- Очистите и нажмите на небольшие участки: Не снимайте всю клейкую основу сразу! Это классическая ошибка новичка. Вся липкая поверхность подвергается воздействию пыли, грязи и случайных прикосновений пальцев. Вместо этого начните с одного конца и отогните всего несколько дюймов бумажной или пластиковой подложки.
- Применяйте сильное и равномерное давление по всей длине: Прикладывая первую часть полоски к подготовленной поверхности, плотно и равномерно прижмите ее по всей длине. Большим пальцем или небольшим твердым валиком (например, J-образным валиком для ламината) проведите полосу вниз. Цель состоит в том, чтобы гарантировать отсутствие пузырьков воздуха и обеспечить полный и плотный контакт клея с поверхностью. Продолжайте этот процесс: снимите еще немного подложки, прижмите полоску и повторяйте, пока не будет нанесена вся длина.
– Дайте клею затвердеть: Это шаг, который требует терпения. Большинство клеев, чувствительных к давлению, не достигают максимальной прочности мгновенно. Для полного застывания им необходим период «отверждения» или «смачивания». Хотя первоначальное соединение будет прочным, окончательная прочность соединения может занять от нескольких часов до полных 24-72 часов для высокопроизводительных лент, таких как 3M VHB. Во время отверждения избегайте каких-либо нагрузок на полосу.
Шаг 5. Усиление установки для гарантированной долгосрочной безопасности
С клеем вы все сделали правильно. Теперь пришло время зафиксировать все это на месте с помощью механической опоры. Это шаг, который превращает хорошую установку в отличную.
- Добавление монтажных зажимов: Это ваше основное подкрепление. Разместите по одному монтажному зажиму примерно через каждые 12–18 дюймов (30–45 см) вдоль полосы. Крайне важно добавлять зажимы по обе стороны от любого угла или изгиба полосы, поскольку это места с высоким напряжением. Кроме того, обязательно поместите зажим очень близко к началу и концу полосы, к которой прикрепляется кабель питания.
- Установка полосы в канал: Если вы выбрали профессиональный метод использования алюминиевого профиля, на этом этапе вам необходимо надежно закрепить швеллер к стене или потолку с помощью собственных зажимов и шурупов. Далее можно приступать к вклеиванию подготовленной светодиодной ленты в чистый канал с последующим защелкиванием крышки рассеивателя.
Шаг 6. Интеллектуальная прокладка кабелей и окончательные соединения
Последний штрих — убедиться, что проводка и силовые соединения не мешают вашей установке.
- Избегайте натяжения и напряжения полоски силового кабеля. Используйте небольшие кабельные зажимы с клейкой основой или другие решения для прокладки кабелей, чтобы аккуратно закрепить шнур питания на стене или поверхности, гарантируя, что он немного провисает и не натягивает конец светодиодной ленты. Свисающий шнур питания – частая причина неисправности в точке подключения.
Часть 4. Устранение распространенных проблем со светодиодной лентой после установки
Даже при хорошей установке иногда могут возникнуть проблемы с самими лампами. Вот краткое руководство по устранению некоторых из наиболее распространенных проблем, основанное на опыте многих домашних мастеров и профессионалов.
Проблема: конец моей полосы заметно тусклее, чем начало
- Причина: падение напряжения. Это очень распространенная проблема при длинных пробегах светодиодных лент. Проще говоря, электричество теряет часть своего «давления» (напряжения), проходя через сопротивление медной полосы. На достаточно большом расстоянии это падение напряжения становится заметным, в результате чего светодиоды на дальнем конце ленты становятся тусклее, чем светодиоды рядом с источником питания.
- Решения:
- Сила середины: Для длинного прямого участка вместо подачи питания с одного конца подключите источник питания к середине полосы и сделайте два более коротких участка, идущих наружу в противоположных направлениях.
- Используйте систему более высокого напряжения: Именно поэтому существуют светодиодные ленты на 24 В. Системы с более высоким напряжением менее восприимчивы к последствиям падения напряжения на больших расстояниях. Если вы знаете, что вам нужно пробежать более 16 футов (5 метров), выбор системы на 24 В с самого начала будет мудрым решением.
- Подайте мощность на обоих концах: Для очень длинных или мощных трасс вы можете проложить отдельный комплект проводов от источника питания до дальнего конца полосы и соединить их параллельно. Это вводит новую мощность в конце, устраняя падение напряжения.
Проблема: часть моей ленты мерцает, имеет странный цвет или полностью не работает
- Причина: Это почти всегда указывает на плохой электрический контакт или физический обрыв чувствительной цепи полоски.
- Шаги по устранению неполадок:
- Проверьте разъемы: Если проблемная зона находится рядом с беспаечным разъемом, это наиболее вероятный виновник. Эти зажимы иногда могут со временем ослабнуть. Откройте разъем, убедитесь, что полоска вставлена до упора и что металлические штыри плотно прилегают к медным площадкам, а затем надежно зажмите ее.
- Аккуратно покачайте полоску: Аккуратно надавите и пошевелите проблемный участок полоски. Если индикаторы мигают, когда вы его перемещаете, это указывает на ослабленное внутреннее соединение или микротрещину на гибкой монтажной плате.
- Осмотр на наличие физических повреждений: Внимательно посмотрите на любые признаки повреждений. Не была ли полоса слишком сильно согнута в углу, что привело к образованию складок? Есть ли вмятина или порез сбоку? Скоба случайно проткнула цепь?
- Самое надежное исправление: Обычно наиболее целесообразным способом обращения с мертвой частью является ее вырезание. Острым канцелярским ножом аккуратно вырежьте нерабочую часть по обозначенным линиям разреза с обеих сторон. Затем вы можете устранить разрыв, используя либо беспаечный «мост» или «удлинительный» разъем, либо припаяв небольшой отрезок провода.
Проблема: вся полоса вообще не включается
- Порядок устранения неполадок (начните со стены и продвигайтесь к полосе):
- Проверьте розетку: Розетка работает? Самый простой способ проверить — подключить лампу или другое заведомо исправное устройство. Если он не включается, проверьте панель автоматического выключателя вашего дома.
- Проверьте источник питания (драйвер): Есть ли на самом блоке питания небольшой индикатор и горит ли он? Если у вас есть мультиметр, установите его на напряжение постоянного тока и проверьте выход источника питания, чтобы убедиться, что он обеспечивает правильное напряжение (например, 12 В или 24 В). Неисправный блок питания является распространенной причиной отказа.
- Проверьте все физические соединения: Все ли вилки и разъемы между источником питания и светодиодной лентой надежно вставлены? Соединитель ствола полностью вставлен?
- Изолируйте компоненты: Если вы используете встроенный контроллер или диммер между источником питания и полосой, попробуйте удалить его из системы. Подключите светодиодную ленту напрямую к источнику питания. Если полоска загорается, значит, проблема кроется в неисправном контроллере или диммере.
Заключение
Слишком распространенное разочарование от падения светодиодных лент не является неразрешимой загадкой. Это предсказуемый результат недооценки сил физики и важности правильной техники. Но, как мы видели, успех заключается не в том, чтобы найти одну-единственную «волшебную» ленту или клей. Речь идет о профессиональном, многоуровневом и продуманном подходе к вашей установке.
Успешная, долговечная и красивая установка светодиодной ленты прочно держится на трех столпах: тщательная подготовка поверхности Чтобы создать идеальную основу, осознанный выбор использования качественные и подходящие клеии решающее дополнение механические опоры например, монтажные зажимы или алюминиевые каналы для обеспечения долгосрочной безопасности. Понимая и устраняя коренные причины неисправностей — от слабого заводского клея и пыльных поверхностей до невидимого воздействия силы тяжести и тепла — вы можете гарантировать, что ваше освещение останется именно там, где вы его установили, на долгие годы.
Теперь вы обладаете экспертными знаниями, позволяющими диагностировать проблемы, предотвращать их до их возникновения и устранять их в случае возникновения. Пришло время перестать поднимать светильники с пола и начать наслаждаться безупречным, красивым и долговечным освещением, о котором вы впервые мечтали. Ваш идеальный проект освещения уже ждет.
Ознакомьтесь с нашей коллекцией высококачественных клеев и монтажных решений
Часто задаваемые вопросы (FAQ)
- Вопрос: Могу ли я просто использовать суперклей, чтобы приклеить светодиодные ленты?
- Ответ: Мы настоятельно не рекомендуем этого делать. Хотя это может показаться быстрым и надежным решением, большинство суперклеев (цианакрилатов) могут вступать в резкую химическую реакцию с гибкими пластиковыми материалами светодиодной ленты. Со временем это может сделать полоску хрупкой, что приведет к трещинам и непоправимому повреждению хрупких внутренних схем.
- Вопрос: Я тщательно очистил стену, но светодиодные фонари по-прежнему не прилипают. Почему?
- Ответ: Это очень распространенная проблема, и почти наверняка это не ваша техника чистки. Если поверхность чистая, виновато одно из двух: либо сам материал поверхности не подходит для приклеивания (например, сильно текстурированная краска, пористая необработанная древесина или «антипригарный» пластик LSE), или среда слишком сложно (высокая влажность или жара). В этих распространенных сценариях основной предварительно нанесенный клей просто недостаточно прочен. Вам необходимо перейти на более прочный клей, например ленту 3M VHB, и, что наиболее важно, добавить механические опоры, такие как монтажные зажимы, для длительного удержания.
- Вопрос: Сколько монтажных зажимов мне следует использовать для светодиодной ленты?
- Ответ: Хорошее и надежное эмпирическое правило — размещать один монтажный зажим примерно через каждые 12–18 дюймов (что составляет около 30–45 см) по всей длине полосы. Также крайне важно разместить зажимы по обе стороны от любого угла или изгиба полосы, а также очень близко к началу и концу полосы, где крепится кабель питания, поскольку именно эти точки испытывают наибольшую физическую нагрузку.
- Вопрос: Мои светодиодные ленты предназначены для использования на открытом воздухе. Каков наилучший способ их установки?
- О: Для любой наружной установки необходимо использовать «бескомпромиссный» подход, чтобы обеспечить долговечность. Во-первых, убедитесь, что вы используете полностью водонепроницаемую светодиодную ленту (со степенью защиты IP67 или IP68). Во-вторых, после тщательной очистки поверхности используйте прочный, устойчивый к атмосферным воздействиям клей, например, ленту 3M VHB. В-третьих, и это самое главное, щедро используйте монтажные зажимы. Лучший профессиональный метод — установить полосу внутри защищенного от атмосферных воздействий алюминиевого канала с диффузором. Это обеспечивает полную физическую защиту от непогоды, действует как радиатор и гарантирует максимально надежный монтаж.
- Вопрос: Если мои светодиодные ленты упадут, могу ли я повторно использовать клей на обратной стороне?
- О: Нет, не пытайтесь повторно использовать оригинальный клей. Как только клей отслаивается от поверхности, он загрязняется пылью, маслами и микроскопическими частицами и теряет большую часть своей первоначальной способности к склеиванию. Единственный надежный способ исправить это — тщательно отклеить или стереть весь старый, вышедший из строя клей с обратной стороны ленты, а затем нанести новый слой высококачественного двустороннего скотча, прежде чем пытаться повторно установить его на правильно подготовленную поверхность.